How to Edit Shopify Themes for High-Growth Brands

[ SUMMARIZE WITH AI ]
[ FREE CRO TEARDOWN ]
Find the 3 biggest revenue leaks on your store.
Every day a conversion leak goes unfixed, you're paying for traffic that doesn't buy. Get a 5-minute Loom through your PDP, cart, and checkout, with mockups of the fixes. No pitch.
Get My TeardownFor brands operating at scale, editing a Shopify theme moves beyond the visual customizer. It requires a professional development workflow using tools like the Shopify CLI and Git. This technical approach allows for safe, scalable customizations that fuel personalization and conversion optimization without putting your live store's stability at risk.
Why High-Growth Brands Move Beyond the Theme Editor
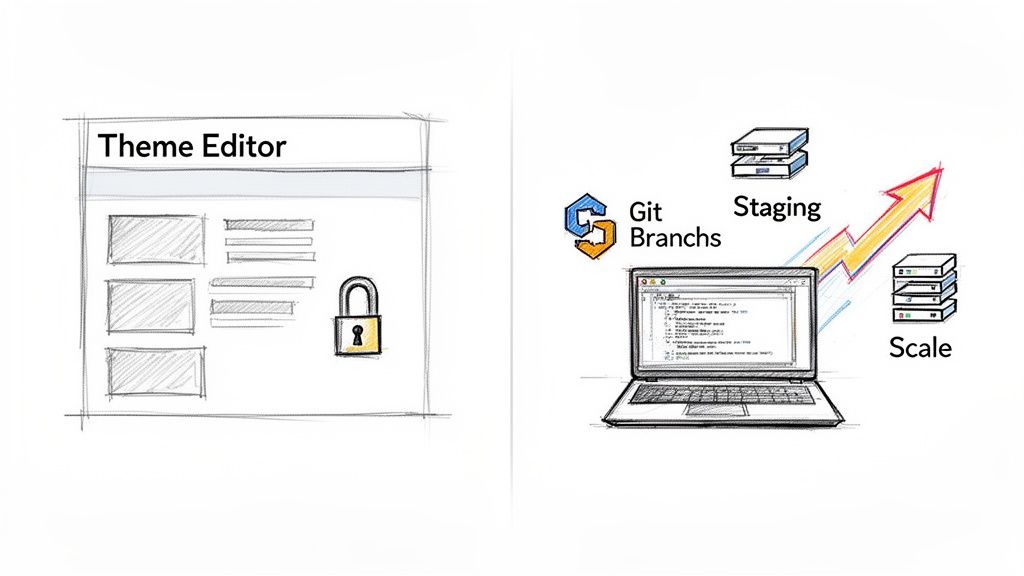
For a Shopify Plus brand generating seven to nine figures, the standard theme editor becomes a growth bottleneck. While useful for minor tweaks, it lacks the precision and safety required for the sophisticated strategies that market leaders deploy. Relying solely on the online customizer means you are limited to the options your theme developer provided.
Winning in ecommerce requires breaking free from these constraints through a structured, technical approach to theme development that shields your live store from costly mistakes. Every change, from a minor copy update to a major feature launch, must be managed in a controlled environment. This prevents downtime, which can cost thousands in lost revenue and erode customer trust within minutes.
The Strategic Need for a Development Workflow
A professional workflow enables growth by creating a system to roll out advanced conversion rate optimization (CRO) and personalization strategies with confidence. This is the source of competitive advantage.
Consider the limitations of the default editor:
- No Version Control: You cannot easily track changes, roll back to a previous version when an error occurs, or allow multiple developers to work on different features concurrently.
- Risky Live Edits: Editing live theme code is like performing open-heart surgery in a moving vehicle. One error could bring down your entire site during a peak sales period.
- Limited Customization: You are confined by the provided settings and sections. Implementing a unique user experience or complex business logic is often impossible.
- Poor Collaboration: Coordinating marketing, design, and development teams within the same live editor interface is inefficient and prone to error.
The online editor treats your theme like a single, fragile object. A professional development workflow treats it like robust software, managed with tools designed for this purpose.
Unlocking Personalization and Performance
The most successful brands understand that a one-size-fits-all storefront is a recipe for mediocrity. Significant conversion gains come from delivering experiences tailored to specific customer segments. This could mean showing a different hero banner to visitors from a specific ad campaign, personalizing product recommendations for returning VIP customers, or testing unique offers for international shoppers.
Executing these strategies requires direct code access and a bulletproof method for testing and deployment. These complex, rule-based experiences cannot be built with the drag-and-drop toggles in the theme customizer. A proper development workflow is the foundation for transforming your Shopify store from a generic template into a high-performance personalization engine.
Understanding Your Shopify Theme's Architecture
Before making meaningful changes to a Shopify theme, you must understand its construction. Think of your theme not as a static design, but as a dynamic system of interconnected files. Knowing how these pieces fit together is critical, whether you're briefing a developer on a small tweak or mapping out a complex personalization campaign.
Shopify’s modern themes, built on the Online Store 2.0 framework, are highly modular. This section-based model provides the granular control needed to build tailored experiences for different customer segments, which is essential for moving conversion rates.
The Core Building Blocks of a Shopify Theme
A theme is a collection of files that control your store's appearance and behavior. To make effective edits, you only need to understand the main components: Liquid, JSON templates, and Sections. Each has a specific role in rendering the final page for your customers.
Here's a breakdown of the most common file types you will encounter.
| File Type | Directory | Primary Function | Example Use Case |
|---|---|---|---|
| Liquid |
sections/, snippets/, layout/
|
Shopify's templating language. It fetches store data (like product titles or prices) and renders it as HTML. | Displaying a product's price and showing a "Sale" badge if compare_at_price exists. |
| JSON |
templates/, config/
|
Data files that define the structure and settings of pages. They tell Shopify which sections to load and in what order. | Arranging the hero banner, featured collection, and testimonials sections on the homepage. |
| CSS | assets/ |
Controls the visual styling, including colors, fonts, spacing, and layout, of your store. | Changing the color of all "Add to Cart" buttons to match your brand's primary color. |
| JavaScript (JS) | assets/ |
Adds interactivity, like image sliders, pop-ups, or dynamic cart updates, without needing a page refresh. | Powering a product image carousel or validating a form entry before submission. |
Understanding this structure is crucial because it dictates how and where you will make your changes.
The power is in modularity. Instead of a hard-coded page layout, you use a JSON template to arrange a series of flexible, editable sections. This separation of structure from content makes Online Store 2.0 powerful for brands that need to adapt and personalize quickly.
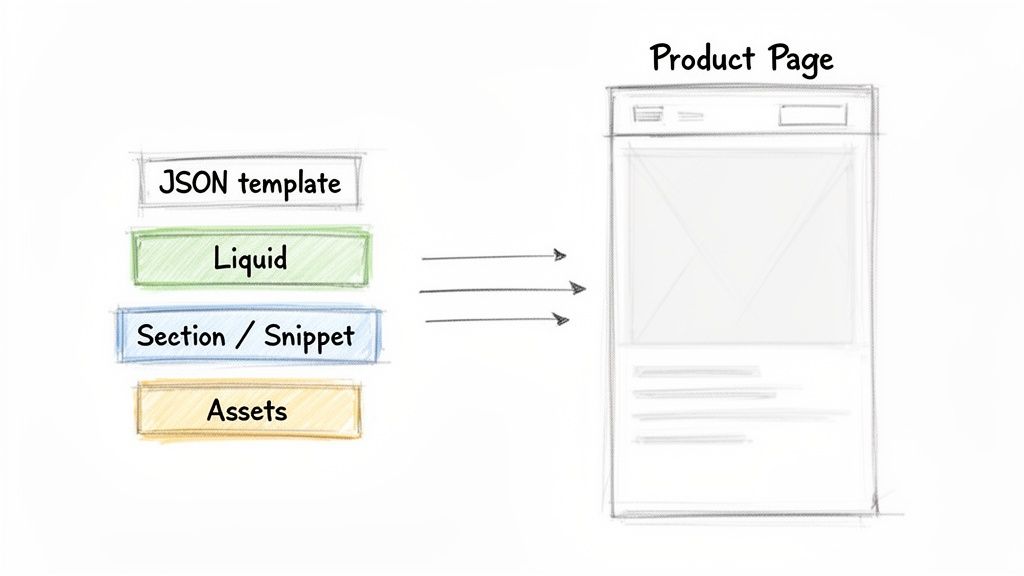
A Practical Example: How a Product Page Comes to Life
Let's trace how a single product page is built. When a visitor lands on a product, Shopify dynamically assembles the page. First, it looks for the master blueprint for that page type, typically a file called product.json inside the templates folder.
This product.json file doesn't hold the content. Instead, it holds a list of the sections to be included, like main-product.liquid (for the image gallery, price, and add-to-cart button) and perhaps a product-recommendations.liquid section for cross-sells.
Shopify then grabs each Liquid file referenced in the template. The Liquid code inside main-product.liquid pulls in the specific product's title, images, variants, and price from your admin. It also handles logic, such as showing a "Sale" badge if the compare-at price is higher.
Finally, all the processed HTML from these individual sections is stitched together into a single page and sent to the customer's browser. This all happens in a fraction of a second. This process is key to understanding where to inject custom logic. For instance, to show different pricing for international shoppers, you would likely edit Liquid files to handle that logic. For more on this, see our guide on how to format currency on Shopify based on a user's location.
An overwhelming majority of merchants, around 98.5%, rely on pre-built themes. This presents a strategic opportunity for Shopify Plus brands. Instead of choosing between a generic theme and a six-figure custom build, the smartest brands augment proven, high-quality base themes. They add layers of personalization and conversion optimization on top, avoiding the massive overhead of starting from scratch.
Setting Up a Local Development Environment
Editing your theme directly in the Shopify admin is a high-risk activity. A single misplaced character can take your entire storefront offline, costing sales and damaging customer trust. The professional standard is to work on a safe, offline copy of your store on your computer, known as a local development environment. This isolates your work from the live site, giving your team the freedom to build and test without impacting revenue.
This process is enabled by the Shopify Command Line Interface (CLI), a tool that allows your computer to interact directly with your Shopify store. You can pull down theme files, preview changes in real time, and push updates when they are ready.
Installing the Shopify CLI and Connecting Your Store
Getting the Shopify CLI running is your first task. While it involves using your computer's terminal, it’s a one-time setup that unlocks a safer and faster workflow. Once installed, a simple login command opens a browser, connects to your Shopify account, and securely links your computer to your store. From there, you can download a complete copy of any theme in your library.
You will have a perfect replica of the theme’s file structure, including all Liquid, JSON, CSS, and JavaScript files, ready for local editing.
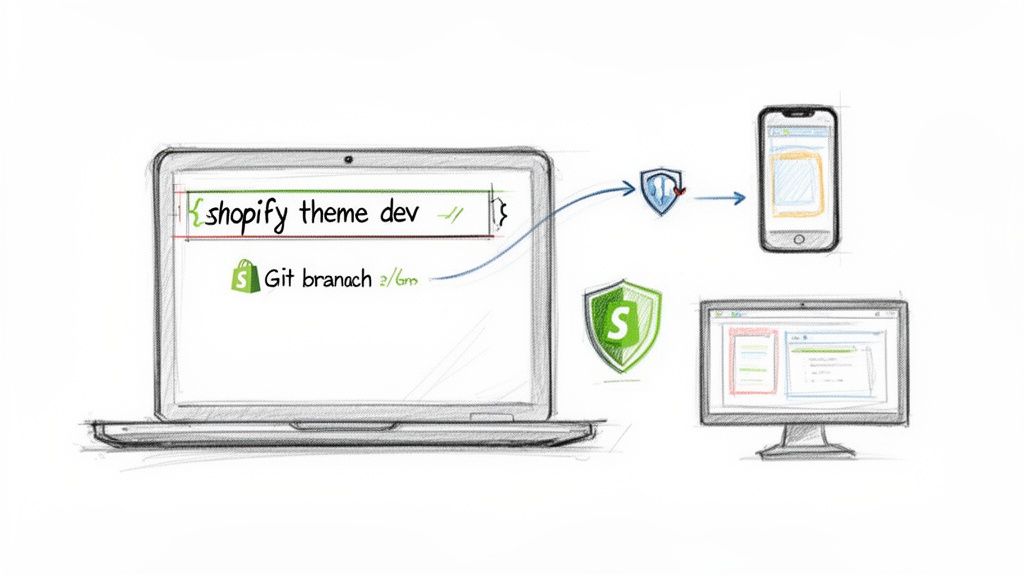
The Power of Real-Time Previews with shopify theme dev
The Shopify CLI's local development server is a standout feature. Running the command shopify theme dev in your terminal spins up a live preview of your theme that only you can see. Any change you save in your code editor is instantly reflected in the browser. This immediate feedback loop significantly accelerates development, allowing you to test a new layout or debug a CSS issue in a fraction of the time. This local preview uses your store’s actual product and collection data, ensuring you are always testing with real content.
Integrating Git for Bulletproof Version Control
If the Shopify CLI is your workshop, then Git is your safety net. Git is a version control system that tracks every change made to your code, acting as a comprehensive history log for your entire theme. It is the industry standard for professional development.
With Git, you create separate branches, which are isolated copies where you can work on a new feature or fix a bug.
A local environment stops you from breaking your live site. Git stops you from breaking your project. By creating a new branch for every task, you ensure that unstable code never makes its way into your main theme until it is fully tested and approved.
Here’s a typical workflow for a new task:
-
Create a New Branch: A developer needs to add a new promotional banner. They start by creating a branch named descriptively, like
feature/q4-promo-banner. - Make Code Edits: All work for the new banner happens within this branch, completely separate from the main codebase.
- Commit Changes: As they work, they save snapshots of their progress (called "commits") with clear notes explaining the changes.
-
Merge the Branch: After the banner is built, tested, and approved, the
feature/q4-promo-bannerbranch is safely merged back into the main theme.
This workflow provides a complete historical record of every change. If a bug is introduced, you can instantly identify the exact commit that caused it and roll back in seconds. For teams managing multiple projects, branching is the only sane way to work, turning theme editing from a risky gamble into a predictable, manageable process.
How to Implement Safe and Effective Code Edits
Once your local environment is running, you can begin making changes that drive business results. A disciplined approach is critical here. The most important rule is to avoid modifying core theme files whenever possible.
Editing files like main-product.liquid or base.css directly creates long-term technical debt. When your theme developer releases a critical security patch or a new feature, you will face a painful and risky manual merge process. The professional standard is to build on top of the theme's foundation by creating new, self-contained components.
Create New Sections and Snippets, Not Just Edits
Shopify's Online Store 2.0 architecture is designed for this modular approach. Your goal should be to build custom features as brand-new sections and snippets. This isolates your custom code, making the theme easier to manage, update, and debug.
Here’s why this is the only sustainable approach:
- Update with Confidence: Your custom sections and snippets are separate from core theme files. You can update to a new theme version without your work being overwritten.
- Keep Your Code Clean: New developers can easily locate your custom code in its own dedicated, clearly labeled files.
- Empower Your Marketing Team: By building new sections with their own schema settings, you give non-technical team members control within the theme customizer, reducing the need for developer tickets for simple text changes.
This strategy is critical for differentiation. Market data shows a few themes dominate the ecosystem. For example, the Trademark theme is used by 23.1% of the top 1 million Shopify sites. You can find more details on Shopify theme usage statistics to see how common this is. Your competitors are often working from the same design foundation. Well-architected theme edits are your primary lever for breaking away from the pack.
A Practical Example: Customizing an Announcement Bar
Let's walk through adding a custom announcement bar with editable text and an optional link. The amateur approach is to hardcode it into the header file. The professional approach is to create a new file in the sections folder, for instance, custom-announcement-bar.liquid.
Inside this file, you define the HTML structure and use Liquid to pull in settings from the customizer. The <schema> block at the bottom tells Shopify what controls to display in the admin.
For our announcement bar, the schema might look like this:
{% schema %}
{
"name": "Custom Announcement Bar",
"settings": [
{
"type": "checkbox",
"id": "show_bar",
"label": "Show announcement bar",
"default": true
},
{
"type": "text",
"id": "announcement_text",
"label": "Announcement text",
"default": "Free shipping on orders over $100"
},
{
"type": "url",
"id": "announcement_link",
"label": "Announcement link"
}
],
"presets": [
{
"name": "Custom Announcement Bar"
}
]
}
{% endschema %}
This JSON block creates an intuitive interface in the Shopify admin, allowing your marketing team to manage the bar without touching code. This is how you build a scalable and maintainable theme. You can apply this same logic to other site elements, as detailed in our guide to creating a high-converting website testimonials page.
Managing CSS and JavaScript for Performance
How you handle CSS and JavaScript files directly impacts your site’s performance and Core Web Vitals. Sloppy asset management is a common cause of slow load times, which kill conversion rates.
Your approach to code edits should be surgical. Add only what is necessary and ensure it loads efficiently. Every kilobyte counts, especially on mobile connections where the majority of your traffic originates.
Follow these best practices for managing your styles and scripts:
-
Use a Dedicated CSS File: Create a new CSS file in the
assetsfolder (e.g.,custom.css) for all custom styles and load it in yourtheme.liquidlayout file. This keeps your changes organized. - Scope Your CSS: Write specific CSS using unique classes for your new sections to avoid unintended styling conflicts with other elements.
-
Load JavaScript Asynchronously: Use the
asyncordeferattribute for scripts that are not essential for the initial page render. This prevents them from blocking page loading. - Leverage Shopify's Asset API: For JavaScript needed only for a specific section, use Shopify's built-in methods to load scripts conditionally. This avoids loading unnecessary code on every page and improves performance.
By working this way, you are not just editing a theme, you are building a robust, performant system that is scalable, easy to maintain, and ready for advanced personalization strategies without compromising speed or stability.
A Framework for Testing and Deploying Theme Changes
A code change is complete only after it has been rigorously tested, approved by stakeholders, and safely deployed to your live store. Skipping this quality assurance (QA) stage is how a simple theme edit becomes a revenue-losing incident.
The process begins by pushing your local changes to a new, non-live theme in your Shopify admin using the Shopify CLI. This becomes your staging theme, a fully functional clone of your work running on Shopify’s servers with your real product data. The staging theme allows your marketing team, designers, and other stakeholders to test new features in a real-world environment without any risk to your live operations.
Here's a simple, three-step workflow that moves your changes from an isolated development environment to coding and, finally, to configuration and testing.
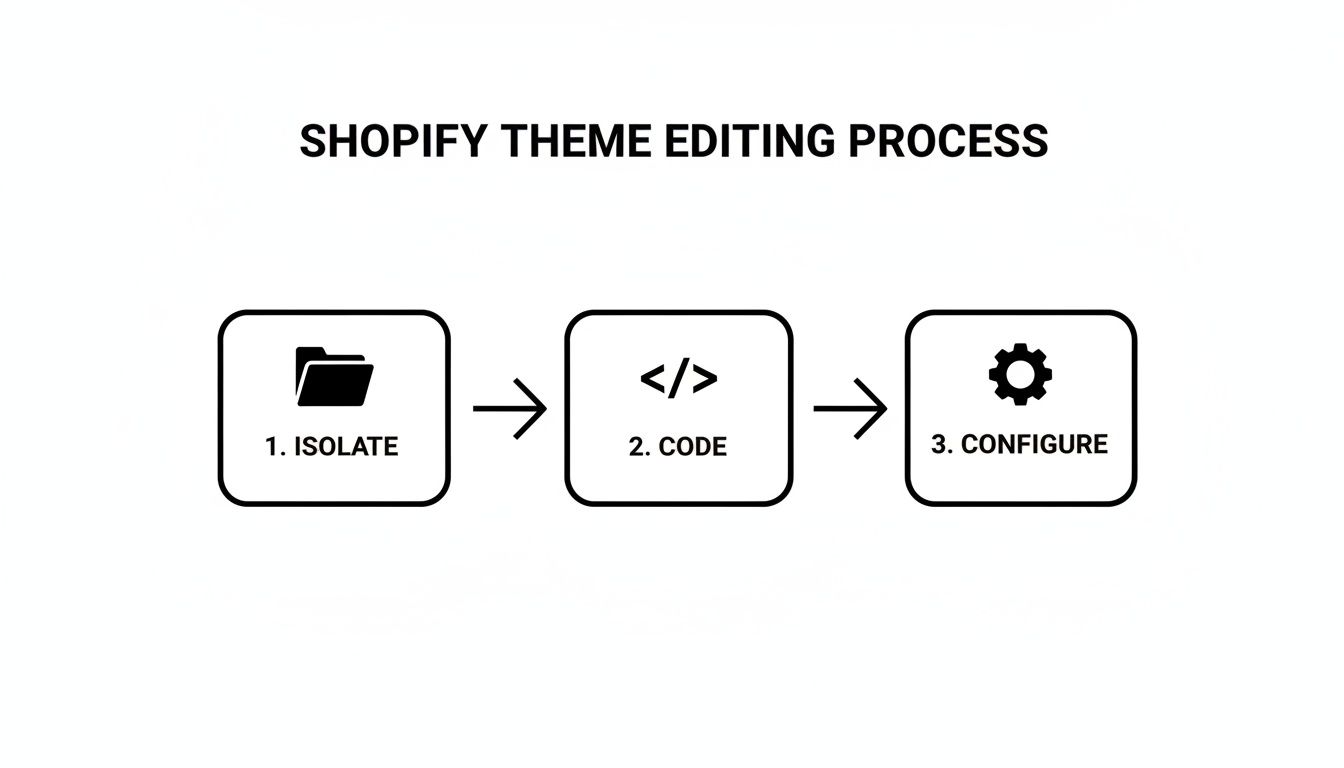
This workflow, focused on developing changes in a controlled environment before integration and testing, drastically reduces risk and maintains live site stability.
Building a Bulletproof QA Checklist
Once the staging theme is ready, methodical QA begins. A comprehensive QA checklist is your best defense against post-launch issues. Your checklist must validate the new feature and its interaction with the rest of the site.
Your QA process should always include:
- Cross-Browser Testing: Verify functionality and appearance on the latest versions of Chrome, Safari, Firefox, and Edge.
- Mobile and Desktop Responsiveness: Test on various screen sizes, from small mobile devices to large desktop monitors, using your browser's dev tools to simulate viewports.
- Core User Journey Validation: Walk through critical conversion paths, such as finding a product, adding it to the cart, and completing checkout.
- Page Speed Analysis: Run affected pages through Google PageSpeed Insights to ensure your new code hasn't created a performance bottleneck.
A rigorous QA process is your final safeguard. It’s the last chance to catch a bug, fix a layout issue, or prevent a performance regression before it can cost you real money. Never rush or skip this step.
For advanced QA, consider visual regression testing tools. These tools automatically detect unintended visual changes, adding another layer of confidence. If you are exploring different validation methods, our guide comparing multivariate testing vs A/B testing for ecommerce is a useful resource.
The Zero-Downtime Deployment
After the staging theme passes all QA checks and receives final approval, the last step is deployment. With Shopify, this process is simple and safe. Because all work was done on a separate, unpublished theme, going live is as easy as clicking a button.
Navigate to Online Store > Themes, find your approved staging theme, and click “Publish.”
Shopify seamlessly swaps your old live theme with the new one. There is zero downtime. This risk-free deployment protects your revenue, maintains customer trust, and allows you to improve your store with confidence.
Another option is to directly push the code from the staging theme to the live one, overwriting and publishing live the latest updates.
This is also a good approach, as sometimes the live theme might be coupled with an app functionality and swapping it out might break something.
Where to Go From Here
You have the playbook. It's time to move from a reactive, "fix-it" mindset to proactively building a better customer experience that drives sales. The goal is to turn a generic theme into a conversion machine. Start with a small, high-impact win to demonstrate the power of this workflow.
Picking Your First Project
Choose a tangible project that shows immediate value. A few ideas to get you started:
- Create a custom PDP section. Add a unique selling proposition or trust-builder section below the “Add to Cart” button, editable from the theme customizer.
- Personalize the hero banner. Build a new banner that shows one message to first-time visitors and another to returning customers.
- Upgrade a collection page. Implement an advanced filtering system or design a custom product grid that better showcases your catalog.
Once you have a project, set up your local development environment with the Shopify CLI. In Git, create a new, cleanly named branch for your work, such as feature/pdp-usp-section. Now you are ready to code without risk to your live store.
This methodical approach is what separates the pros from the amateurs. It shifts you from being a passenger in a pre-built theme to being the architect of your customer's journey.
Do not let an out-of-the-box theme limit your brand's potential. By taking control of your development workflow, you can build, test, and ship the exact experiences that will propel your growth. Your theme should be a launchpad, not a cage.
Common Questions About Shopify Theme Development
When brands move beyond the basic theme editor, a few common questions arise.
After We Code All These Changes, Can We Still Use the Regular Theme Customizer?
Yes, absolutely. A proper development workflow makes the theme customizer more powerful. The objective is to build custom features that your marketing team can control from the Shopify admin they use daily. By creating new sections and snippets with clear settings, you empower non-technical users to make changes, freeing up developers for more impactful projects.
How Do We Handle Theme Updates Without Breaking Everything?
This is why you never edit core theme files directly. When your customizations are isolated in their own new sections, snippets, and assets, they are protected from official theme updates. When a new theme version is released, you can merge those updates without overwriting your work. This process is managed using a version control system like Git, which is essential for tracking changes and handling merges safely.
By building customizations as modular add-ons, you get the best of both worlds, benefiting from the theme developer's ongoing improvements while keeping your unique, brand-specific functionality intact.
What Kind of Skills Does My Team Actually Need for This?
To run this workflow, you need a team member with solid web development skills, including HTML, CSS, JavaScript, and Shopify’s templating language, Liquid. They must also be comfortable with command-line tools like the Shopify CLI and Git for version control. If you don't have this expertise in-house, a specialized Shopify development agency like Ecom Experts or Grumspot can handle the technical implementation while your team focuses on strategy. While a marketing manager should drive the strategy, a developer is required to handle the technical execution to ensure your site remains stable and your strategy is implemented correctly.
At CONVERTIBLES, we build and manage high-impact personalization programs that turn your Shopify Plus theme into a powerful conversion engine. Learn how we help brands scale profit with segment-specific experiences.